This is the first post in a series where I break down my recent ten day trip to Japan, with all the things I’d do differently, and the things I would do again. This post covers all the boring, but extremely important, logistical details. Trains, planes, hotels, luggage, etc.
Now I’m not an expert on Japan, this is my knowledge based after one trip and a few weeks of anxiety fueled pre-trip research. But I will link out to all of the relevant websites I used, so that you can also read to your heart’s content. Think of this as the ultimate Japan Vacation Planning summary page from an over planner.
I traveled with my husband on this trip, so this is written from the lens of a couple. Keep that in mind if you’re traveling with children, a large group, or are new to international travel – YMMV.

This post contains affiliate links, which means I may make a commission if you purchase from these links.
Where and When to Visit Japan
There’s a lot of different factors when it comes to planning your trip to Japan. How many days in total, what cities to visit, how long to spend in each place, what time of year to go, etc. Some of these might be out of your control, like the number of vacation days you can take, or planning around other life events. For us, we settled on ten days, as it seemed long enough to be able to visit multiple cities, and for location we just kind of went with the classic Tokyo-Kyoto-Osaka loop, or the “Golden Route”. You know it’s a popular itinerary when it has it’s own nickname.
The only deviation from the Golden Route that we took was a day in the Fuji Five Lakes area, as my husband wanted to see Mt. Fuji while we were in Japan. If you want to guarantee Fuji views, the best time is in the winter because the sky is generally clear at this time.
We ended up going in early October, which I thought was a pretty nice time. It’s still relatively warm at that point (80°F and humid) but it’s not peak summer which can get up to 100°F! We also missed the autumn colors, which would have been stunning to see, but it also meant that things were less busy and booked. If you want to see the cherry blossoms in spring or the autumn colors, definitely book everything early, as things booked out even without those events happening.
Flights to Haneda
What flights are available to you of course depend on where you’re leaving from. From Seattle we’re lucky to have a few options for nonstop flights into both Narita and Haneda airports in Tokyo. If you’re staying in Tokyo, Haneda is the better option if you have a choice, as it’s located much closer to the city than Narita.
We flew ANA into Haneda, and then from Osaka Itami to Haneda on our return journey. Unfortunately, we had to deal with a cancelled flight out of Seattle on our original departure date. It was a mechanical problem with the plane, so I can’t really fault anyone, but it was unfortunate that a day in Tokyo was lost. ANA handled the cancellation well, offering hotel vouchers to local Seatac hotels, rebooking us on the same flight a day later, and also offering a small amount of compensation.

Once on the plane, I was fairly impressed. Legroom was pretty nice for economy (we were on a 787). The food was also fine, which is really the bar I set for international flights. The dessert is a mini vanilla Haagen-Dazs container, so they get points for that delicious decision. The only con to the in flight experience was that the flight was really warm. I’m used to shivering on long haul flights, so I was over-prepared with a jacket and long pants. On the return flight I just packed my jacket in my checked luggage and saved the space.
Going through entry customs and immigration at Haneda was fairly straightforward. There’s a lot of good signage in English and it’s mostly just follow the crowd. I would highly recommend using Visit Japan Web, which essentially allows you to fill out the paper customs form ahead of time and scan a QR code at various terminals. It’s way easier to fill out before you’re on the flight, where you have all your travel details handy. I believe we also got to go to a different customs line, where we could walk through automatically without handing the paper form to a physical person.
Similarly, exit customs was straightforward as well. I honestly don’t remember that many details, other than we had to take a transfer shuttle in between terminals for our connection. It was a lot of following the queue and going to where people pointed.
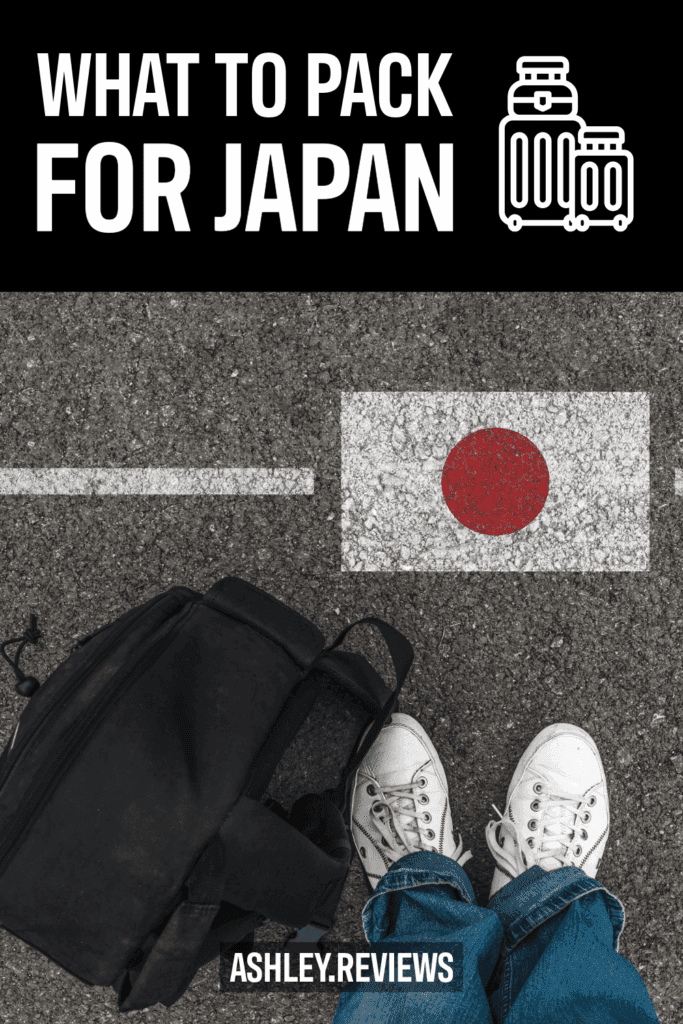
What to Pack When Traveling to Japan
There were a lot of suggestions on the internet for how to go about packing for a long trip to Japan. A lot emphasize packing lightly, some even suggest going carry-on only. A lot of it is going to come down to your personal preference. Would you rather skip doing laundry and haul a larger bag up and down train steps? Can your bigger bag fit on the shinkansen, or do you need extra space? Would you want to buy a bag in Japan if you end up buying too many things to bring home?
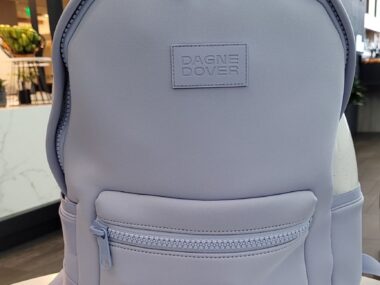
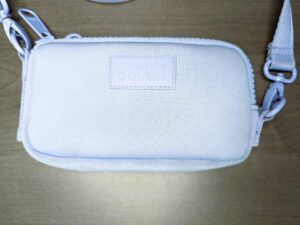
We opted for one checked luggage size bag and one backpack per person, and we packed fairly lightly for ten days. As we accumulated souvenirs, we just filled up the empty space in our bags. Our strategy worked pretty well for us, but we are both able-bodied people who could easily carry our roller bags up or down a couple flights of stairs without much complaint. It was annoying to go on the local trains with bags, but it wasn’t that crazy – I never felt like we were taking up an insane amount of space with our luggage.
If you want my recommendations for any length trip, check out my favorite travel essentials.
Luggage Shipping (Takkyubin)
If you are traveling between cities with larger bags, you should consider using the Takkyubin luggage shipping service. Apparently this is what a lot of local Japanese people use to move their luggage to their destination. Reading about it online for the first time I was extremely skeptical, probably because I couldn’t imagine giving my luggage to FedEx or UPS stateside and having it arrive in one piece on time. But the service is really easy if you’re staying at a hotel.

To use the service, I confirmed the drop off time with the front desk the afternoon before we checked out. I was given a QR code to fill out a form online with my information and my forwarding destination details. In the morning when we checked out, I brought the filled form and the person at the front desk confirmed my details and measured my bags. The hotel then took my bags and gave me a receipt to show at my destination hotel. The entire process took about five minutes, and cost around $38 for one large Away suitcase and one medium Away suitcase.
The only con to the Takkyubin service is that there’s not usually same day shipping, so you will be without your large bag for a night. This worked out fine for us because we had a one night stopover in the Fuji Five Lakes area, so when leaving Tokyo, we just shipped our bags to our hotel in Kyoto and brought our backpacks with a change of clothes. Upon arrival in Kyoto, our bags were in our room, and we didn’t have to worry about them when traveling on the shinkansen.
Check Your Prescriptions Before Your Trip to Japan
This is probably a good comment for any international travel, but make sure you don’t accidentally take illegal drugs into Japan. ADHD medicine that’s commonly prescribed in the US may be outright banned in Japan. The best resource I found for this is this r/JapanTravel wiki guide, which explains things pretty clearly, and also links to the official page with the list of controlled medications.
What Clothes to Pack for Japan
Obviously this is going to depend on what time of year you’re traveling. For our early October trip I made the mistake of assuming it would be chilly at times, like most of the weather in the US.
It was not chilly. My light jacket stayed in my luggage the entire trip. My jeans stayed in my luggage the entire time. I wore my jean shorts far too often. Yes, Japanese people tend to dress conservatively and wear pants all the time, but I gave up on pretending like I wasn’t an American tourist. Japan is hot and humid and I can’t stand being in sweaty pants all day, so I wore shorts.
There’s also some people who recommend packing as little as possible, and using hotel laundry facilities to clean clothes, or buying whatever you might need at a store like Uniqlo. I personally didn’t want to bother figuring out the logistics of laundry, and ten days of t-shirts doesn’t really take up all that much space. If you are planning on wearing clothes that you buy in Japan, just be sure that you’ll fit into Japan standard sizing, which can run smaller and shorter than US sizing.
I also would recommend packing two pairs of walking shoes. I like to swap shoes when I’m doing a lot of walking, as it gives my feet a break from the hot spots that might occur in a specific pair of shoes. If you’re prone to blisters, I’d recommend packing some blister care products and using them proactively. I bought these KT blister prevention strips before leaving and they definitely saved my feet from some awful heel blisters.

What Toiletries to Pack for Japan
Hotels in Japan have a pretty good selection of toiletries. Obviously there’s soap and shampoo and conditioner, but depending on the hotel there were also small hairbrushes, toothbrushes, toothpaste, razors, etc. I decided to forgo packing soap and hair products and I survived without my hair looking like a disaster, which is pretty rare. There’s also plenty of drug stores around where you can probably find something you’ve forgotten if you have a decent translate app.
Apparently Japanese deodorant is not as effective as US deodorant – which makes sense when most of the population has a gene to prevent body odor. So if you’re a smelly Westerner like myself, I would make sure not to forget your deodorant.
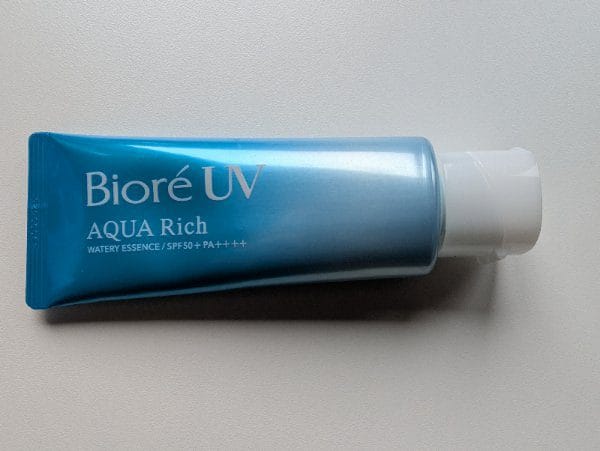
Japanese sunscreen is elite, and I followed recommendations to skip bringing my own. There’s a variety of different brands, and there are plenty of skincare YouTube videos that will have recommendations. I bought the Biore UV Sunscreen on my first day and I loved it and I bought a three pack before coming back to the US.
What Hotels to Book in Japan
I went through a lot of analysis paralysis when trying to book hotels in Japan. It’s hard to determine what a ‘good’ location is when you’ve never been to a city, and it’s tough knowing that a bad location means more time wasted in transit to where you want to be. Eventually I just ended up winging it, and picked a hotel in the area rated the best by whatever the top link on Google said. This strategy was effective. Luckily for you, reader, this planning has been distilled down into hotels that are good. I can say that because I stayed there.
I booked most of these hotels about a month before our trip. I would definitely recommend booking earlier, there were already some hotels sold out in that time frame. I was lucky to not have a strict budget per night, so I was able to choose mostly based on location. Weekends are definitely more expensive in Tokyo and Osaka, so be prepared for that.
Also, the standard hotel room seems to be two single beds. When booking for two people it’s not common to find a Queen or King room. And rooms that are double with one bed seem to be smaller than their single bed counterparts – definitely check the size of the room before you book! If two hotels are roughly equal in price, a larger room could definitely be a selling point.

Where to Stay in Tokyo
Tokyo is huge, by the way. There’s a lot of places to stay in the city. People who are better experts than me have dissected the best neighborhoods to stay in based on vibes, price, attractions, etc. Essentially I made the decision to stay in Shibuya because it seemed cool and had a good location on the main JR Yamanote line, which is the main loop train line around Tokyo.
We stayed at the Shibuya Excel Hotel Tokyu, which was awesome. I booked a Superior Twin City View room, and they upgraded us at check-in to the highest floor. Highly recommend a city view, I literally just stared out and looked at all the lights and people for a while.

The hotel is in the chaos, there’s so many people. People shopping or going to work in the morning and afternoon, young people wandering around into the night. It’s fun, it’s high energy, I loved it. If you want a place that seems more relaxing, don’t stay in Shibuya.
Location-wise the hotel is great. It’s pretty much connected to the train station (or a block away if you choose a wrong exit). Shibuya is also centrally located to the Meiji Shrine and Harajuku, which I really wanted to see, and is very close to Shinjuku, another area to explore. Other parts of the city are further train rides, but that’s going to be the case for anywhere. Like I said, Tokyo is huge, there’s not one location that is central and perfect for every attraction.
Mt. Fuji Ryokan
Originally we were going to just do a day trip to the Fuji area, but our friends told us about this incredible ryokan (Japanese style hotel) that they stayed in with a onsen (hot spring bath) on the rooftop with incredible views of the mountain. After their glowing recommendation, we had to go and experience it for ourselves. And now, this is my glowing recommendation.
Hotel Kaneyamaen offers both traditional Japanese-style rooms and those with Western beds. We booked the Sanri Western room with a private bath, and I cannot recommend that more. Onsens are separated by gender, so if you want to hang out with a member of the opposite sex, the private bath is the way to go. Also, you don’t have to trek outside of your room if you want to take a dip.
Our room had a daybed set up right against the window, so once you’re done with the onsen, you can relax and take in the view of Fujisan. Our arrival day was unfortunately overcast, but Fujisan appeared the next day. The hotel is positioned to have an incredible up-close view to the mountain, so I would highly recommend getting a room with a view.

The hotel is on the more expensive side, but it’s more of a resort stay than a normal hotel. Dinner and breakfast are included, and are not to be slept on. Dinner was incredible, a traditional Japanese multi-course kaiseki meal – the plating itself was beautiful and the taste of the food was excellent. Breakfast was a huge breakfast buffet, with a variety of cuisines available.

Other amenities include an expansive garden with a tea house where you can have a cup of tea, a nightly taiko drum show, and of course the rooftop and inside onsens.
The hotel has a shuttle from the two closest train stations, and also offers a longer shuttle to the nearest bullet train stop for a small fee. It made it super easy to travel to and from the hotel, which is a little removed from the town. Just be prepared to use a pay phone to call the hotel shuttle if you don’t have cell service.
Honestly, staying at Hotel Kaneyamaen was an incredible experience and I would do it again in a heartbeat.
Where to Stay in Kyoto
In Kyoto we stayed at the Cross Hotel Kyoto. The hotel has a very cool vibe, I felt very hip walking through the halls. Our room was great, I booked the Superior King Room, which I believe is the mid-tier room in between Standard and Deluxe.
I found the location very convenient for sightseeing. You can walk to the classic Gion district and you’re a few blocks away from the Nishiki Market. It’s right by two train stops – the Kyoto Shiyakusho-mae Station which is on the Tozai Line, and the Sanjo Station on the Keihan Main Line. The Keihan Main Line can take you to Fushimi Inari, and the Tozai line can connect you with the train that goes to Arashiyama. We didn’t really have issues getting around the city in this location.

There’s also plenty of shopping and food in the area around Nishiki, and we didn’t have to go far for some souvenir shopping. There’s also a lot of bars in the area if you want to do some bar hopping.
Where to Stay in Osaka
Our final hotel was the Centara Grand Hotel Osaka. This is a five star hotel, which is a little fancier and a little more expensive than I normally book. Because I booked somewhat late a lot of other hotels in the area were sold out, and the price was not that different than a 4 star hotel in the area, so I just decided to go for it. I booked the Deluxe King Room.
We had awesome views of Osaka – this was yet another hotel where I stared out the window quite a bit, watching the trains on the track below. The room was great, no complaints.

This was the only hotel where I think I missed on the location a little bit. It was a solid 10-12 minute walk to get to the train station, which really felt long compared to our previous hotels. This is splitting hairs, though, you essentially walk through a mall to get to Namba station, and there’s a ton of shops and restaurants and things to see along the way. I think it just hit harder because our feet were aching at this point in the trip.
I did really like that we were so close to Namba and Dotonbori – there’s so much to see and shop and eat in this area. Namba station also has a lot of train lines, so it’s very easy to maneuver elsewhere in the city
Trains in Japan
I hope you like traveling by train. That’s most of what you’re going to be doing in Japan. That and walking. Train travel is convenient and amazing and fast and cheap and literally everything that it’s not in the US. (Am I jealous? Absolutely!)
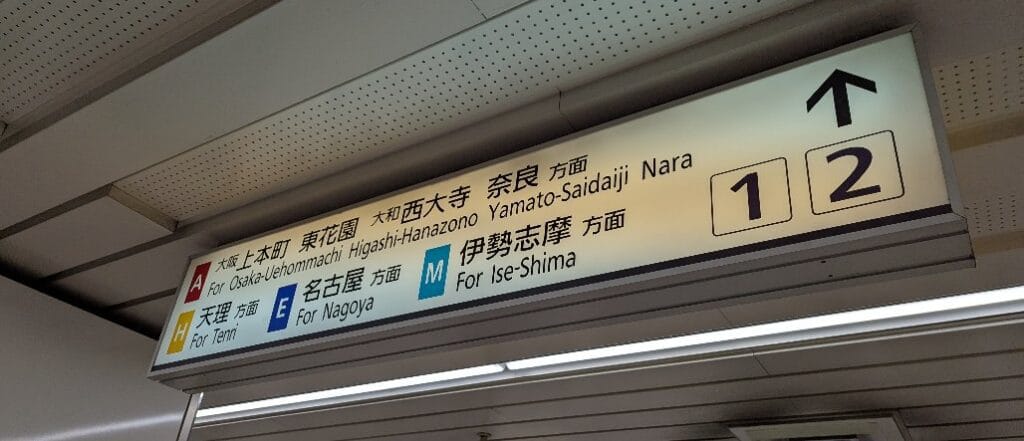
If you look at the Tokyo subway map, you’re probably going to freak out because it’s a lot. There’s a lot going on there. But navigating the train system was pretty easy. Google Maps is really clutch, as it gives specifics like what platform the train should be on, what car you should get onto for a quick transfer, and what exit to take to get to your destination the fastest. Important signage is almost always in English, so as long as you can follow arrows, you should be able to make your way around.


The easiest way to deal with fares is to pick up an IC Card once you land in Japan. IC Cards are magic tap cards that hold a balance that is valid on almost all local trains. They also work at vending machines and other places with tap to pay. You do need cash to load the card, but as far as I could tell most train stations have a terminal to load money on the card – again, English language available, it’s very easy to use. Some people might be able to use Apple Wallet, but as and Android girlie, I had a physical card. There’s a wealth of info on how to obtain and use these cards here.

With an IC Card, I only needed to book the bullet train and the train to Fuji. Some people just recommend buying the tickets in Japan at a ticket kiosk, but I’m an overplanner, so I made sure to book them ahead of time. There’s some reports that people have trouble with foreign credit cards and the bullet train reservation system. I used an Amex after reading those threads, and had no problems, so if you encounter that and have multiple card providers, I’d try a few and see if one of them works.
Booking the Fuji Excursion Limited Express Train
For getting to Fuji, there’s a few options between busses, trains with transfers, and the non-stop Fuji Excursion train. We chose the Fuji Excursion because it was easy to figure out and the schedule aligned with our check in time at the hotel. If we weren’t staying the night, we also would have considered booking a private car to do a tour around the area, as there’s quite a bit to see in a spread out area.

I used the JR-East Train Reservation website to book the tickets, which was a little confusing, but not too bad. My main confusion was the ticket selection page. Essentially, if you want to pay for the base train fare with your Suica card, you can, but you still need a Limited Express ticket, which is the cheaper fare. If you don’t want to pay with Suica, you will pay the larger amount and get both a regular fare ticket and the Limited Express ticket.

This added a little hiccup in Shinjuku, as we paid for the train to Shinjuku with our IC Card, but had the regular fare ticket. We had to exit the gates with our Suica card, then go right back in, but this time scanning the paper ticket. Not a terrible thing, but it might trip you up if you’re in a rush or don’t understand what ticket you bought.
Buying online also means you need to physically print out the tickets at a JR-East kiosk. That was very easy, and they sent a reminder email the day before. Finding the right kiosk in a larger train station can be a little confusing, but they’re generally right outside the entrance to a JR train line.
Booking the Shinkansen (Bullet Train)
For the bullet train to Kyoto, we used the hotel shuttle to get to Mishima station, so we only had to book the train from Mishima to Kyoto. I used the official SmartEx website to book the tickets, which was fairly straightforward. Booking ahead of time did save some money – the SmartEx website can have special fares for bookings 21 days and 7 days out.
Booking ahead also allows you to reserve the seats you want – which, if you’re on the line from Tokyo to Kyoto, you should definitely choose the side that has Mt. Fuji views if possible. This also will allow you to book seats with oversized luggage space, if that’s something you need.

Riding the train itself was really fun, especially as an American who has ridden Amtrak exactly once. They’re not called bullet trains for nothing – the scenery absolutely flies by. The ride is also really smooth for how fast you’re going. We sat in the regular class car and didn’t have any issues with space – you can upgrade to the Green car, which is more spacious supposedly, but I didn’t care enough to pay the extra cost.
Miscellaneous Useful Japan Info
Can I Travel Japan Without Knowing Japanese?
Yeah, definitely. Granted, we didn’t go super far off the beaten tourist path, but we really didn’t have too many problems with a language barrier. There’s a lot of text that’s not translated, but in terms of important signage, like at the airport or train stations, pretty much everything was at least in English, as well as sometimes Korean or Chinese. Most restaurants had an English menu (especially places where you ordered via QR code), or for street stands the gesture and point method was perfectly fine.
I’d also say that most people we interacted with had enough English to get by. We’re so obviously not Japanese that there was not a ton of attempts of people speaking Japanese to us besides the standard greeting. Or they led with “I don’t know English” which helped us switch to gesturing or Google Translate if it was a complicated ask. Honestly, we’re definitely spoiled knowing English, as I know our signage for other languages here in the US really pales in comparison.
How Do I Use My Cell Phone in Japan?
Speaking of Google Translate, I’d definitely recommend a data plan. We got a lot of use out of Google Maps for transit, and hopping between wifi access points while you’re on the go would just be time consuming and annoying.
We used an eSIM for the first time on this trip, and it worked great. Never had a problem with finding a network, besides some spots in Nara. Otherwise, even on the train and subway, we had a reliable data connection. It’s also significantly cheaper than using Verizon’s daily rate for data. The international data with the regular Verizon plan is $10/day, where the eSIM cost $12 for 5 GB over 15 days.
Your data usage is of course going to depend on what you’re planning on doing on your phone. I used just over 3 GB of data over ten days. I was conservative in the beginning of the trip, not doing anything data intensive unless I was at the hotel. Once it became clear I was not going to blow through 5 GB of data, I just started using my phone as usual (streaming Instagram reels on the train, for example), so I think 3 GB was actually a little high for the time period we were there.
I used Ubigi for the eSIM because it supposedly had 5G connectivity vs Airalo (affiliate link) which was cheaper but only advertised 4G. I didn’t get 5G all that much, so it’s up to you what network you want to use (Reddit says both are good). I’m definitely going to use an eSIM for future international travel, though, it was so easy and cheap.
How Early Should I Book My Trip To Japan?
Earlier than we booked, for sure. Actually, the flights were booked at a reasonable time, about 3 months ahead of time. The hotels I probably waited too long to book, and I started booking 6 weeks ahead of time. Especially Osaka, which I booked last. We were there over a weekend so I think that was part of the reason there were fewer options to choose from.
If there’s a popular restaurant or attraction, I’d start looking into booking a month out, or even earlier. We had no restaurants booked when we started the trip, and that worked fine for us, but a lot of the restaurants that take online bookings were full or had terrible times when I started looking two weeks ahead of time.
Attraction-wise, if there’s something that’s a must-do I would book as early as you know you want to visit. Or at least do your research on what you want to prioritize. Certain things like the Pokemon Cafe are full almost immediately when the reservations open a month in advance – if that’s on your must do list, you should be prepared accordingly. I booked my must-see attraction (Teamlab Planets) 2.5 weeks ahead of the date and there were time slots that were full even that far out.
Be Prepared to Use Cash in Japan
Despite seeming incredibly futuristic, Japan is still a fairly cash-based society. I pretty rarely carry more than $20 on me in Seattle because I just rely on my credit card to do the heavy lifting. That’s not the case in Japan, and I found out pretty quickly that I needed to remember how to organize my wallet.
It seemed like most larger stores or chain restaurants took all kinds of credit cards, but smaller shops or restaurants were still cash only. You also need cash to add money to your Suica card, credit cards don’t work except for the inital issue of the card.
Coins are also very commonly used – anything below 1000 Yen ($6.50 at time of writing) will be a coin. Having coins is super useful if you want to participate in random gachapon you find, or if you want to use any vending machine. I’d recommend a coin purse to keep track of all the coins you will collect – if you don’t want to bring one from home, it makes a pretty neat souvenir.

More to Come…
If you liked this post, stay tuned for more content about my Japan trip, including our itinerary and everywhere we ate! If you’re interested in other places I’ve been, check out my trip reviews!